
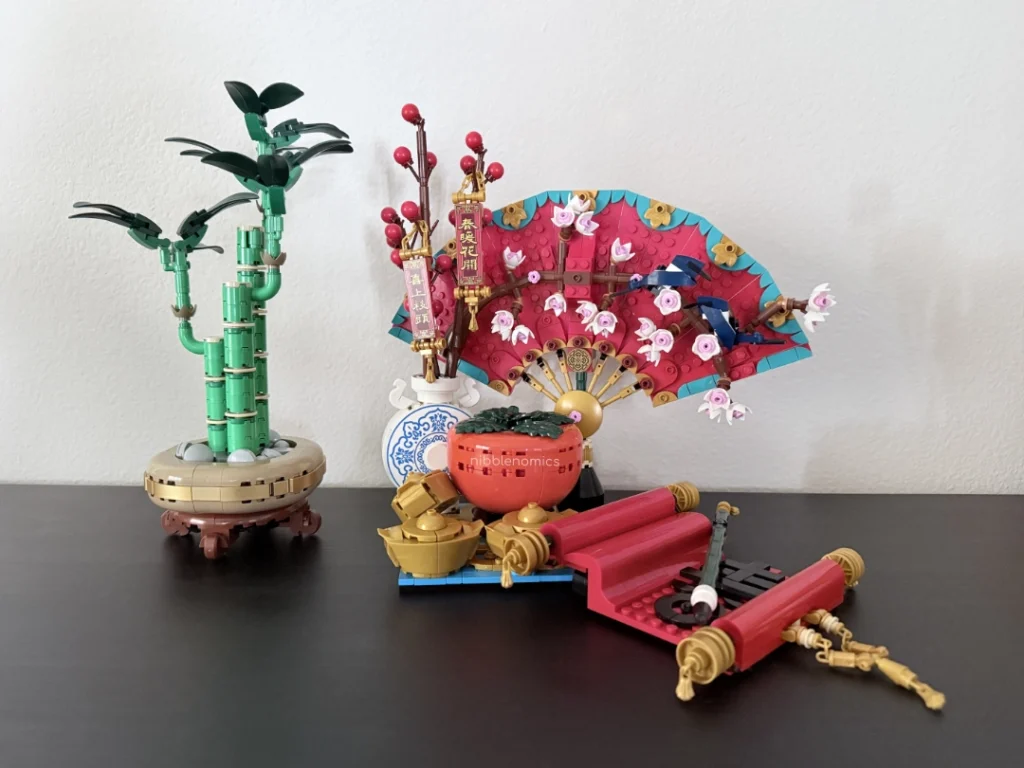
I found both the Lucky Bamboo and the Good Fortune Lego set at my local Costco. So, in preparation for the upcoming Lunar New Year, I decided to buy both to decorate my house.
The Good Fortune set was $68.88 and the Lucky Bamboo set was $21.99. I thought it was a nice touch that Costco decided to price the Good Fortune set with as many 8s as possible without making the price $88.88 since 8 is considered a lucky number for Chinese, Taiwanese, and Cantonese people.
The Good Fortune set is currently $89.99 at the official online Lego store the last time I checked, and the Lucky Bamboo is listed as $29.99. So if you’re interested in buying the set, or on the fence about buying it due to the price, check out your local Costco for a much cheaper deal.
(。-`ω´-) Yes ~
For both the Lucky Bamboo and Good Fortune set, Lego has also announced in their instruction book that they will be switching from plastic to paper-based packaging, and that you might find a mix of both paper and plastic in your box. Unfortunately, it seems like I wasn’t the lucky one to get their new packaging.
Building the Lucky Bamboo
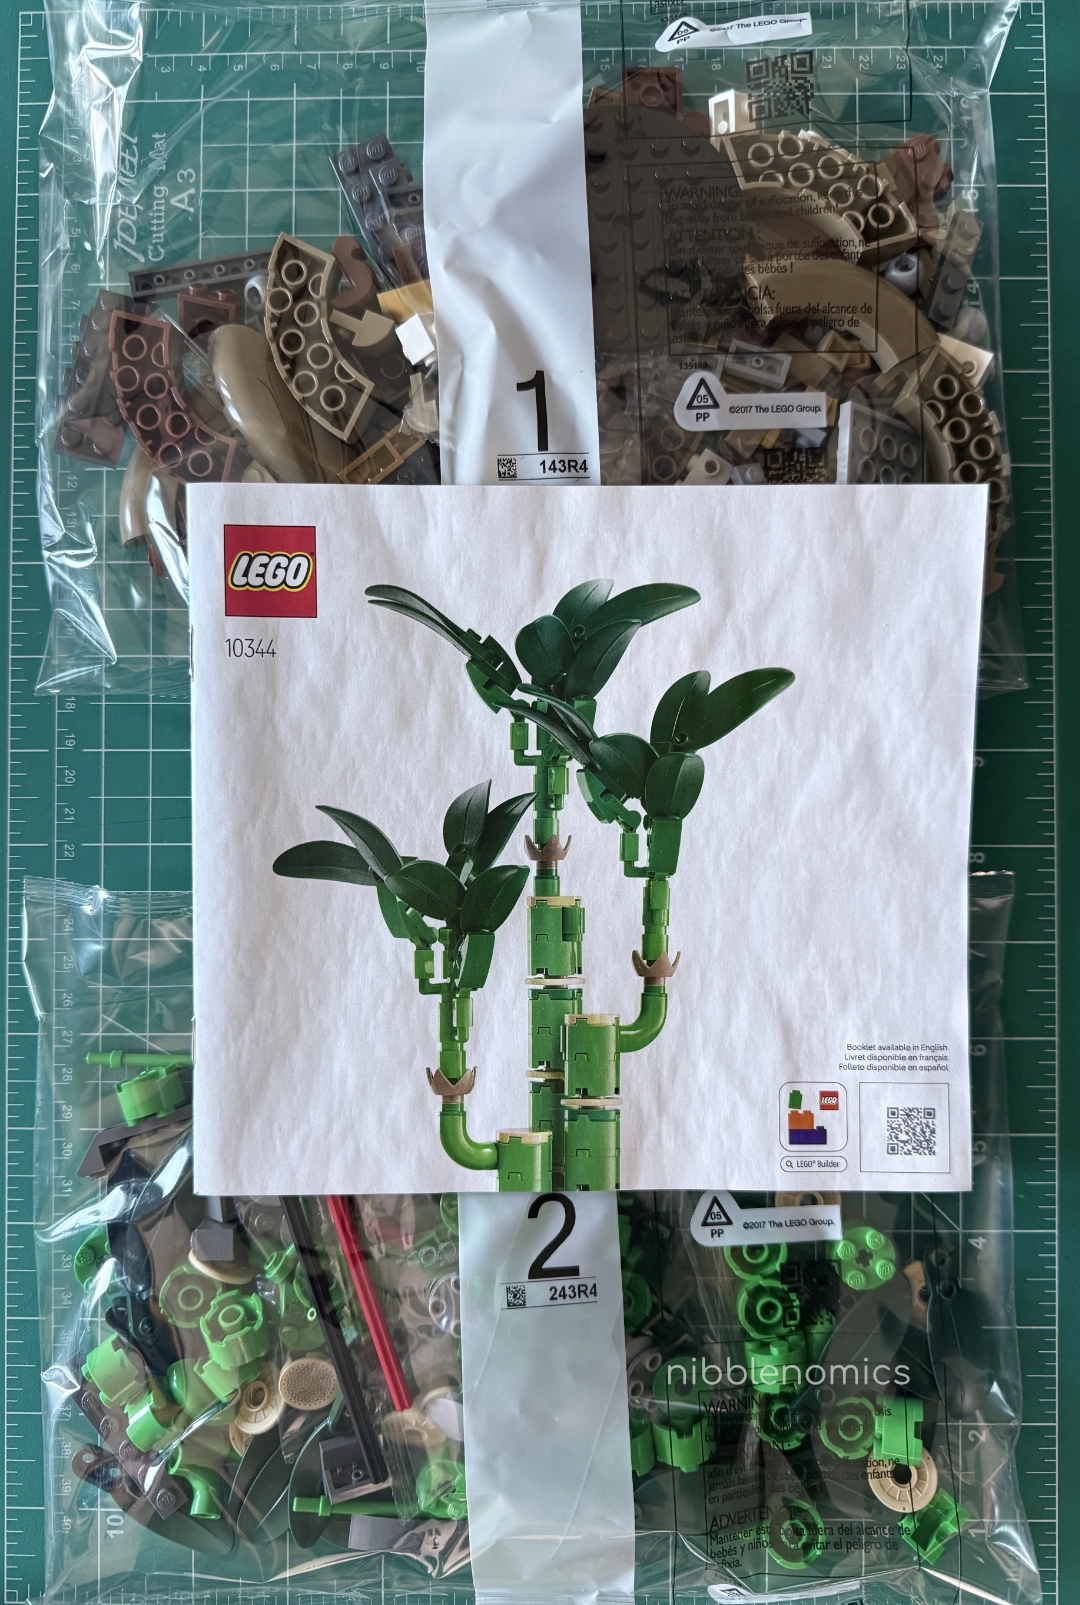
The Lucky Bamboo set requires 325 pieces to build and is rated for ages 18+. It is part of Lego’s Botanical Collection, and, just like many of their botanical sets, it does not disappoint. Since I already have the Lego Bonsai, Orchard, and Poinsettia completed, it was only natural that I add the Bamboo to my collection.
Building the Lucky Bamboo was pretty easy. It took me about 2 hours to build it on my own with a few breaks in between. You can even do it while watching a show in the background since most of the complex steps are at the beginning when building the base.
There are only 2 bags to build the Lucky Bamboo. The first bag is used to build the round base, and the second bag is used to build the bamboo.
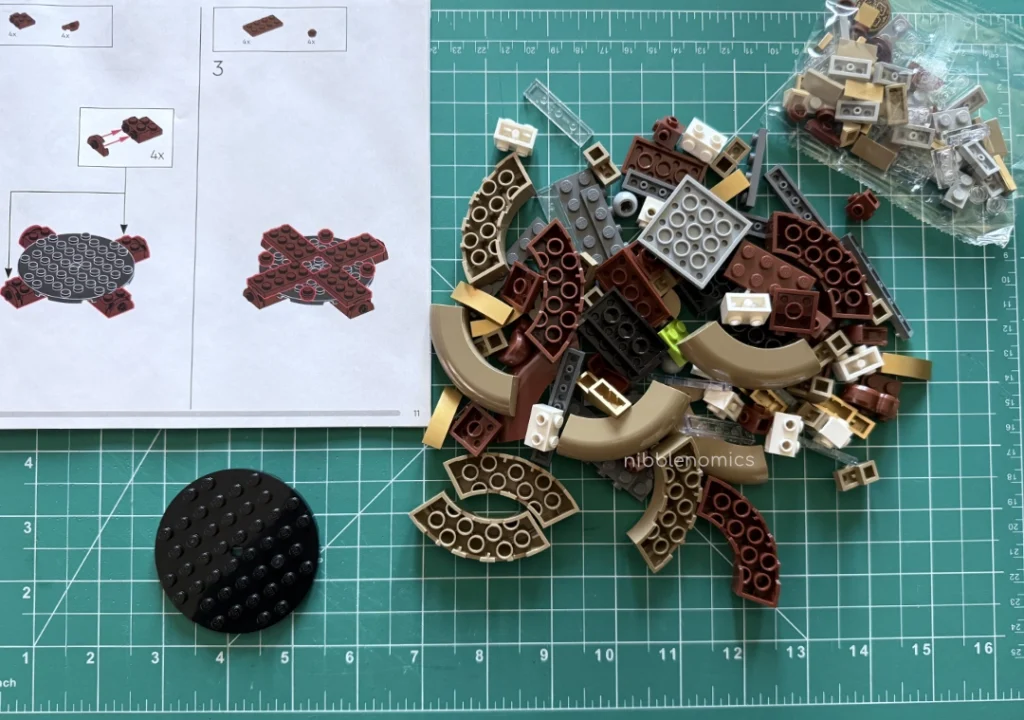
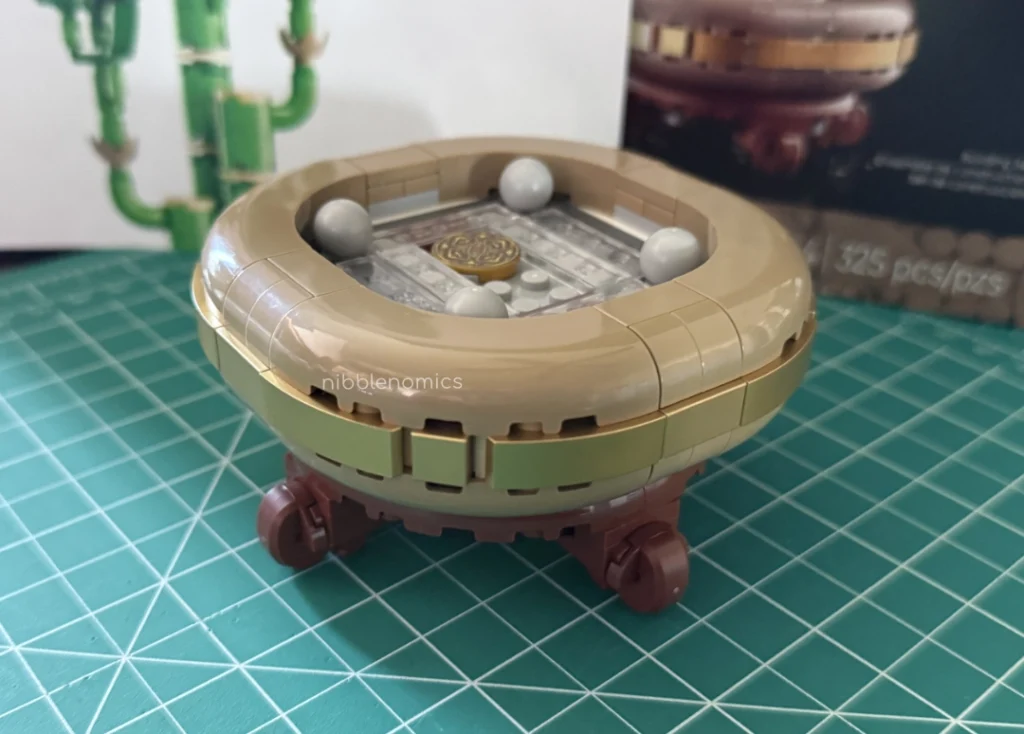
Bag 1: Building the Base
The first bag comes with a small bag inside. Everything in this bag revolves around you building on top of the black circle piece, so it’s a fairly straightforward process. There are a lot of small, clear pieces in this build so be careful not to lose them!
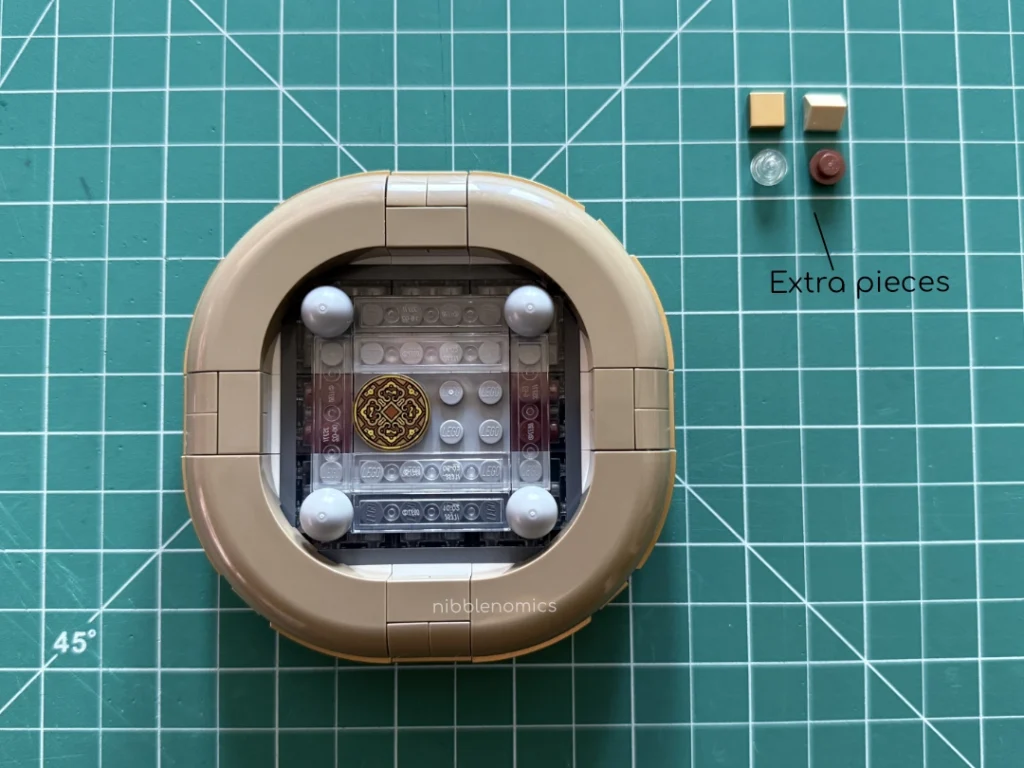
Near the end of the build, there’s a nice, circular holographic piece that you place on the open-top part of the base. Unfortunately, it’ll be covered up by the bamboo. Even though that detail will be hidden, I considered it like a hidden lucky coin.
Bag 2: Building the Bamboo
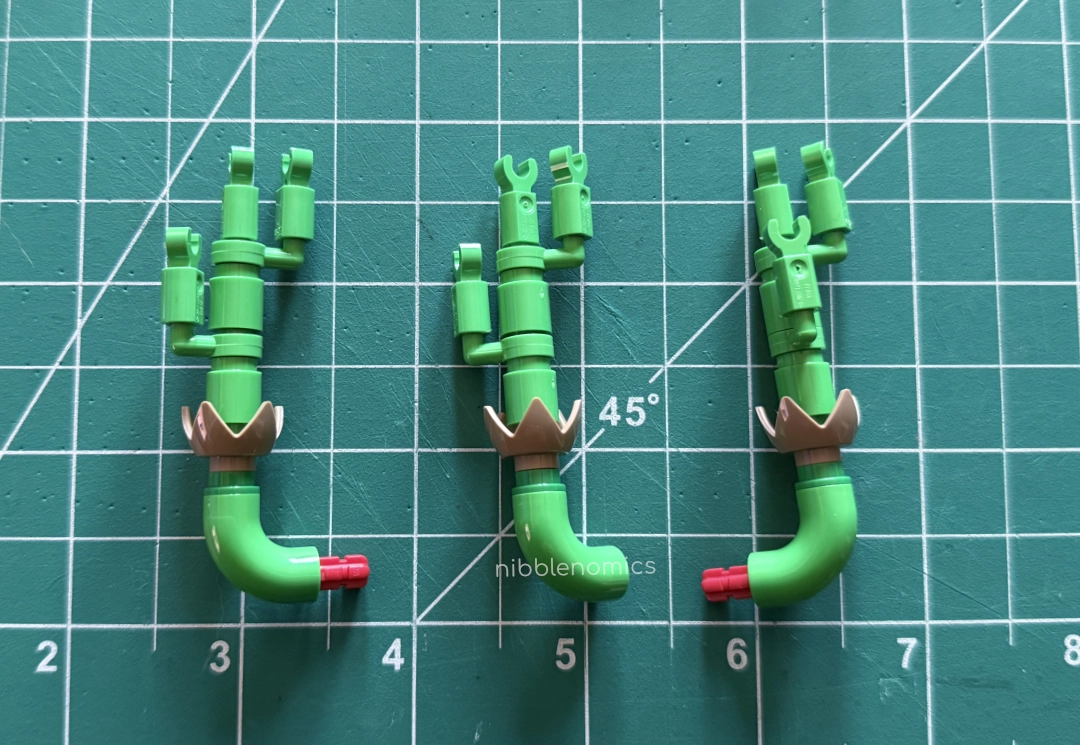
For bag 2, you’ll first set up the base of the bamboo and attach it to the pot you made from the first bag. Then, you’ll be slowly building each stem of the bamboo one at a time. Fun fact: each section in a bamboo stem is called a culm (or canes), which is separated by a culm node (the circular brown piece that acts as a divider).
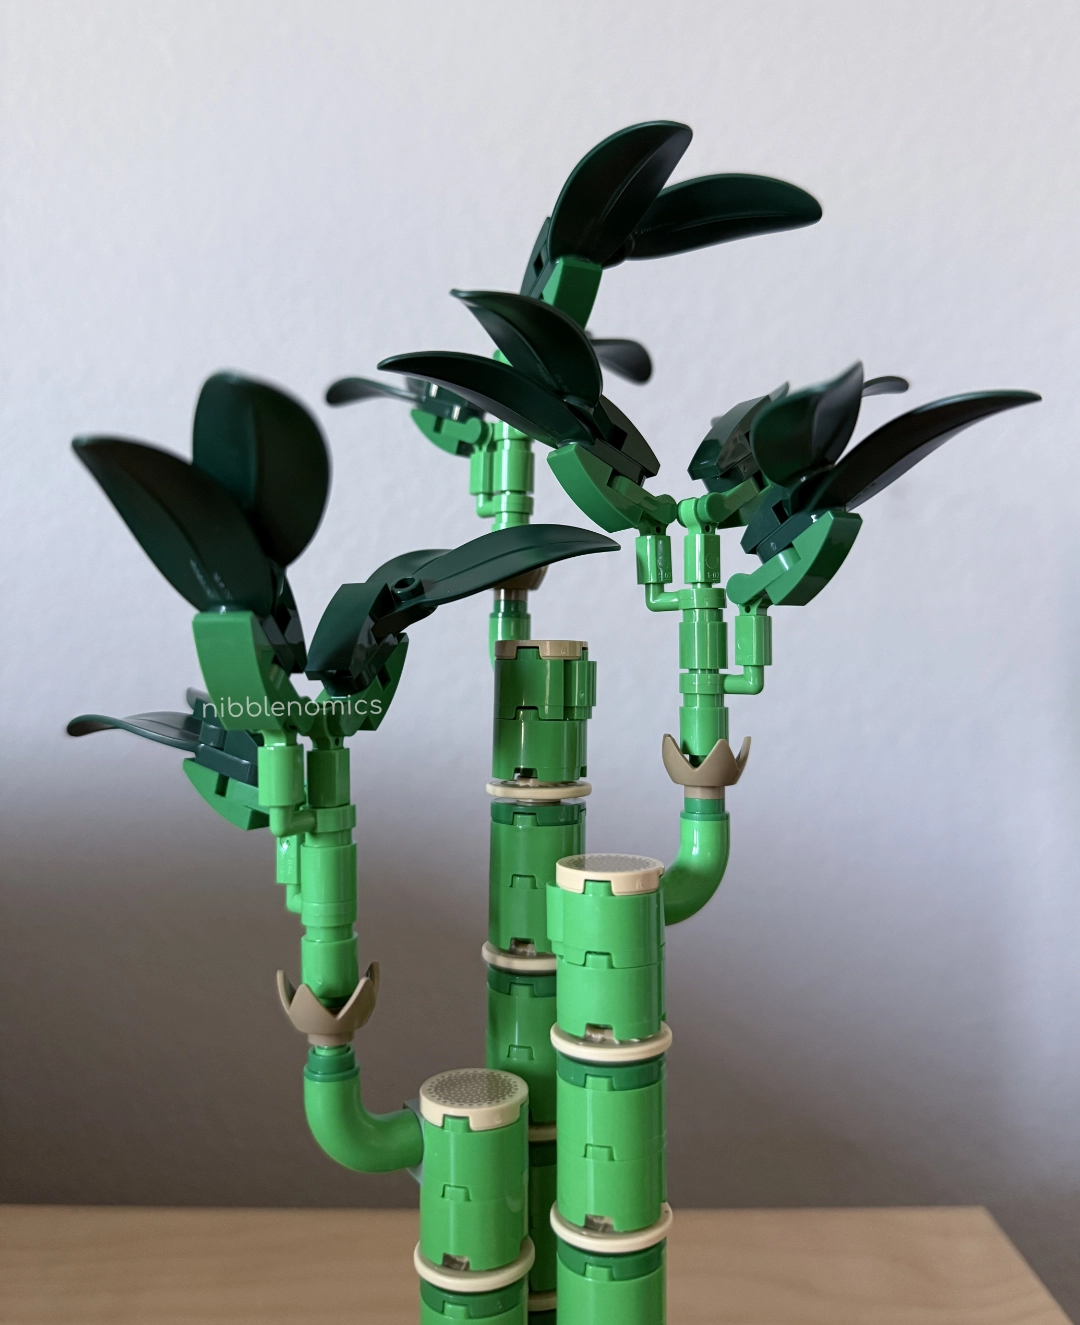
Once you’re done with the stems, you’ll be using Lego hands as branches to hold the leaves. When you actually look at it separately, the completed parts remind me of cactuses.
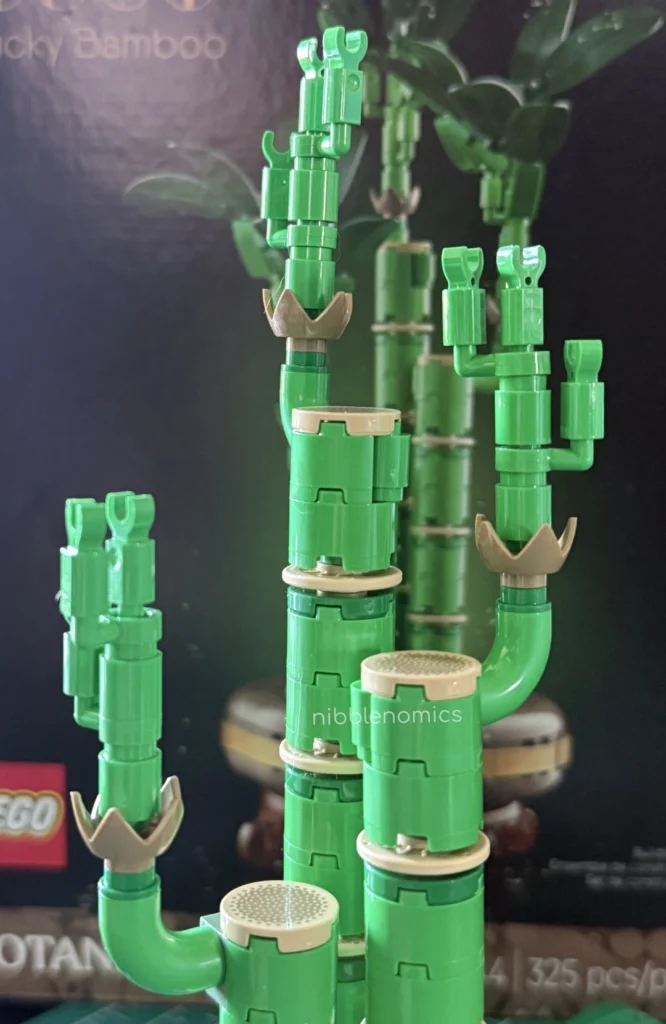
After you put the leaves on, don’t forget about the pebbles!
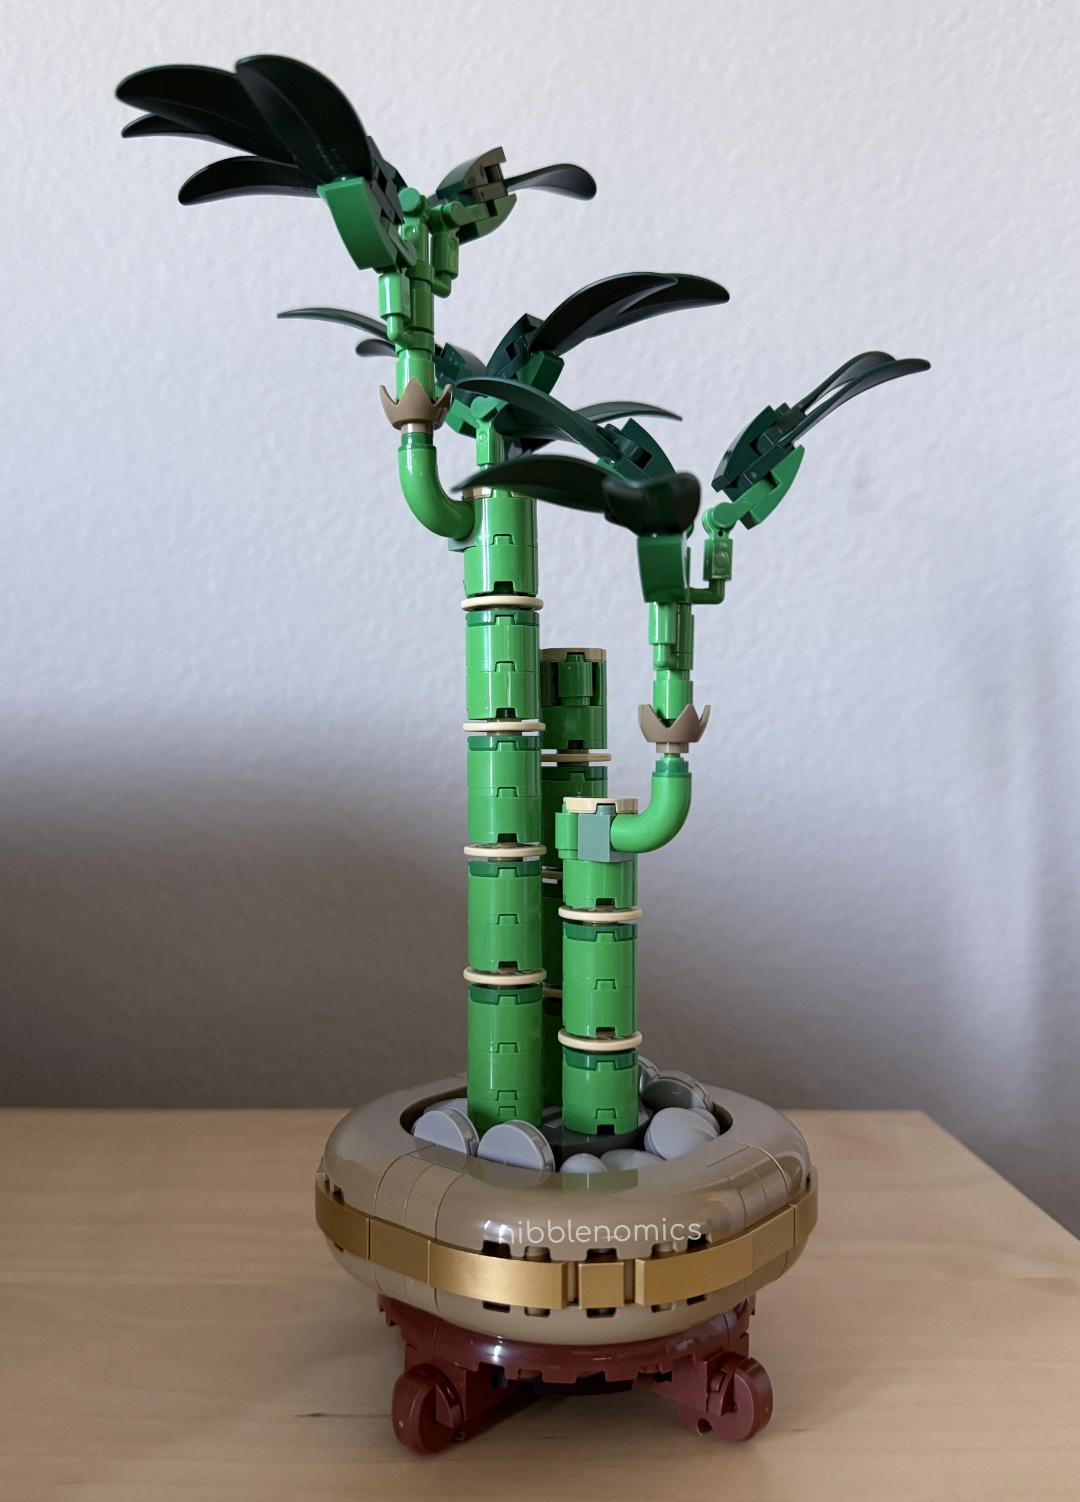
You can be creative and set different heights for your lucky bamboo. However, I chose to leave mine similar to the original because I like the way it looks and only adjusted the angle of the leaves according to my preference.
End Result
Overall, I think it looks amazing and is a good mimic of the original lucky bamboo. The base gives it an elegant look, especially with the gold tile trim, and I really like the added touch of the gray pebbles. The completed build feels very sturdy minus the loose pebbles.
Building the Good Fortune Set
The Good Fortune Lego set requires 1,021 pieces to build and is rated for ages 9+. The set recommends about 1-3 builders so it’s a good set to build with a small group or with family. Since there are a lot of individual items that make up the whole set, everyone can work on their separate items. This set comes with 2 separate books with 1 book mostly dedicated to building the fan. So you can always have 1 person work on the fan while the rest work on the other items in the set.
This was my first time building a Lego set with this many pieces. It took me about 5 hours and 45 minutes to build by myself. Each bag in the set builds a different item, so I took breaks every time I finished a bag. I definitely didn’t finish it in one sitting either. It took me about 2 days to finally get to the end because I decided to procrastinate after getting halfway through.
( ̄□ ̄;)
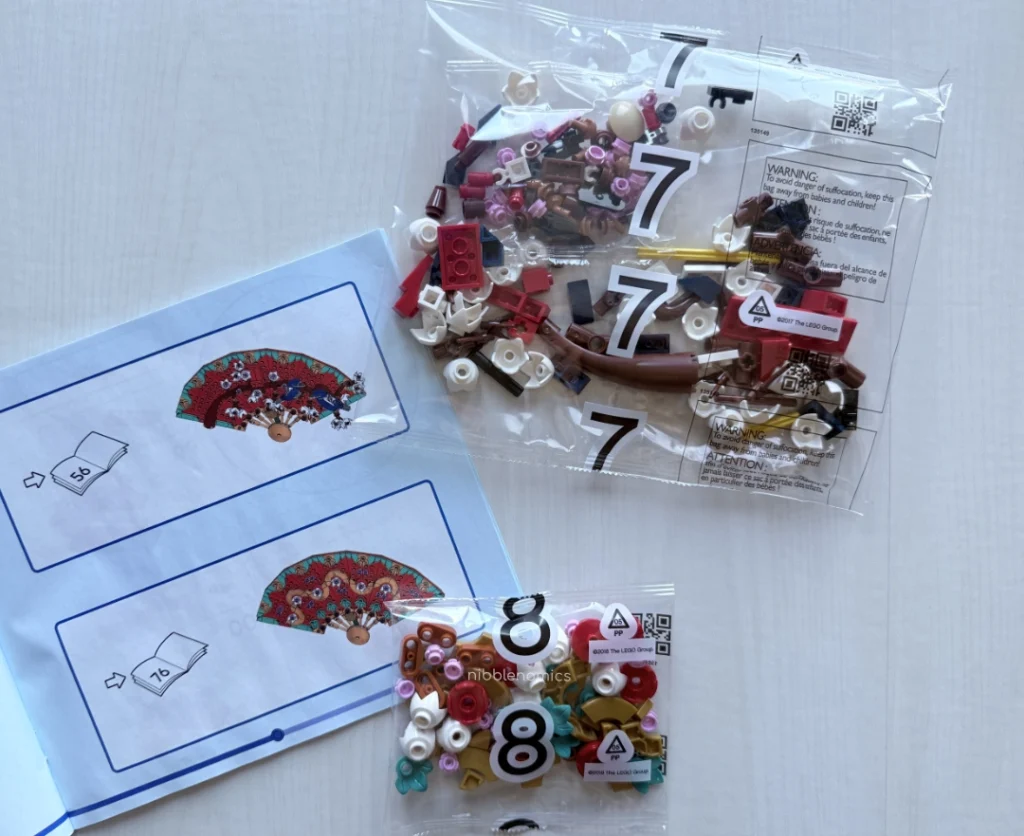
There are 8 bags total (plus a singular black square base & a Lego piece removal tool), but you only need 7 bags to build the whole set. This is because the 7th and 8th bag is the different fan design, so you have to choose which one you prefer.
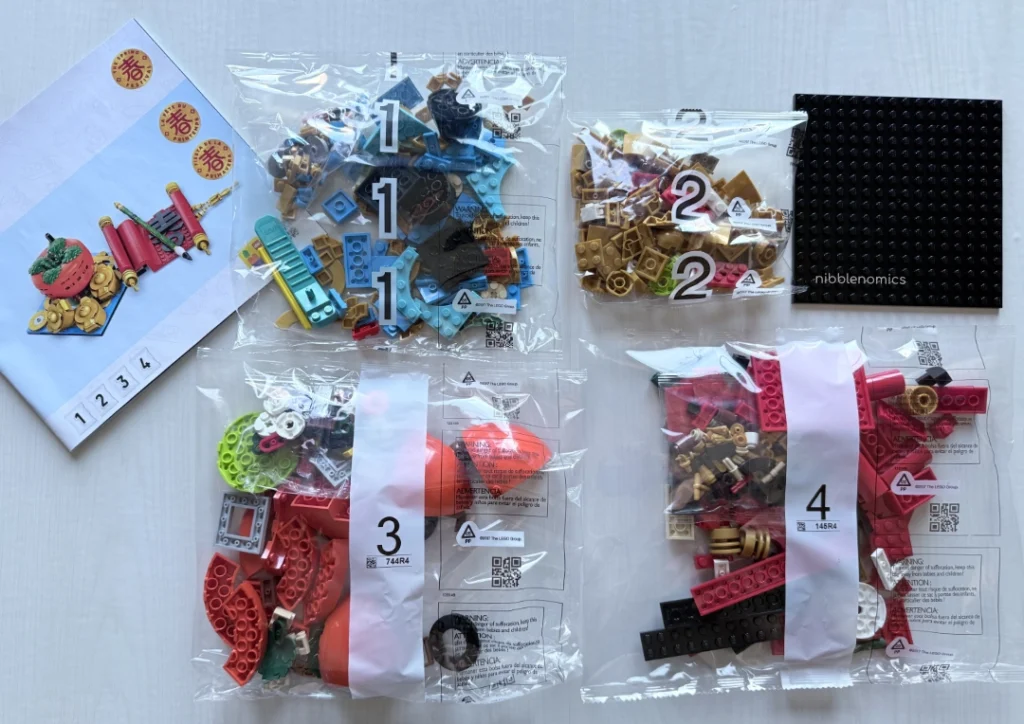
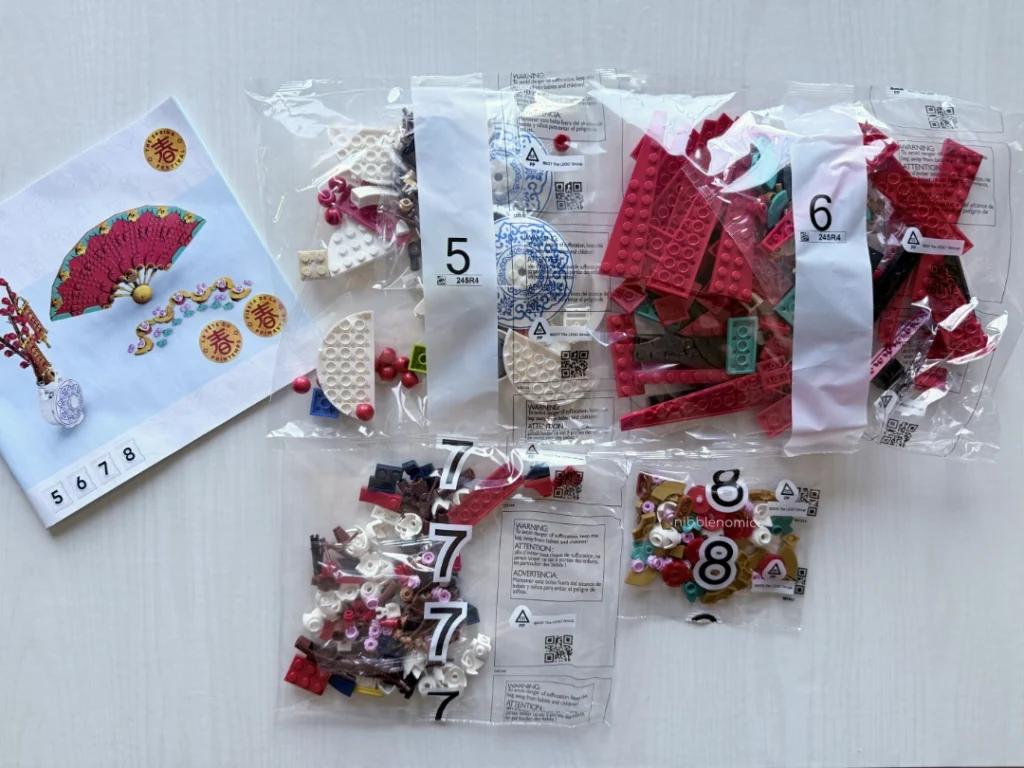
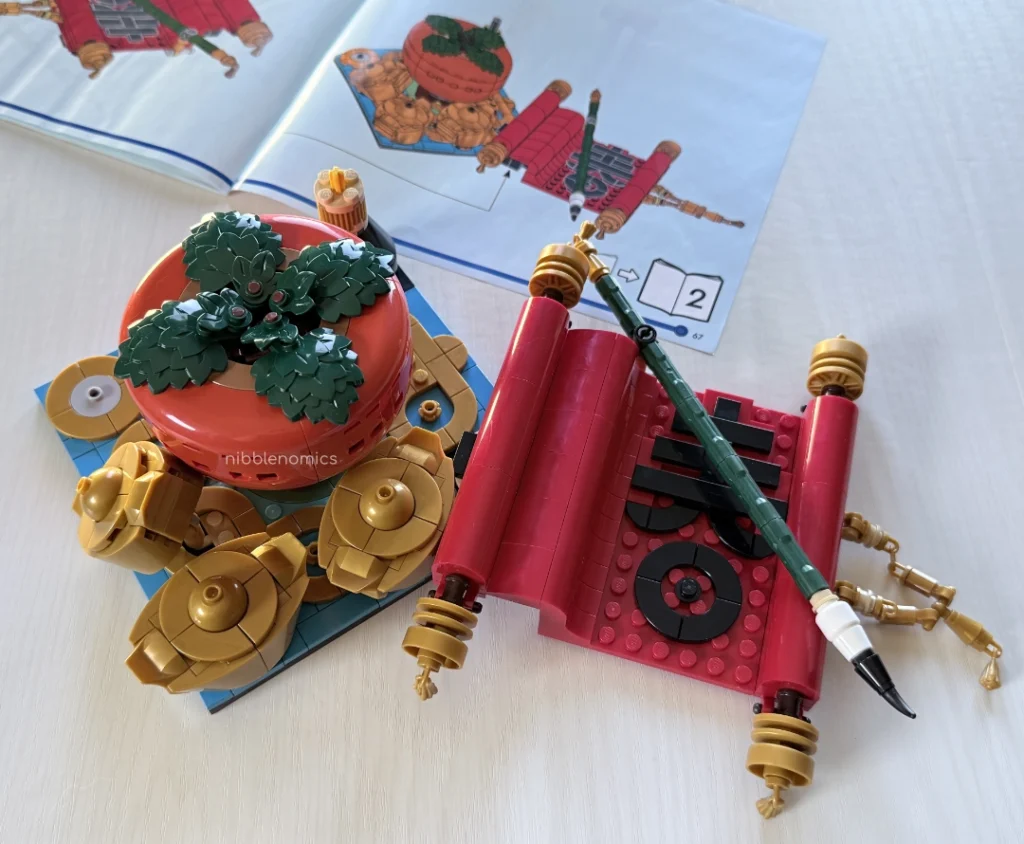
The first book is for bags 1 to 4 and the second book is for bags 5 to 8. The first book covers building the foundation, persimmon fruit, gold ingot, scroll, and calligraphy brush. The second book covers building the vase, fortune red fruits with two hanging scrolls, and the fan with either two Magpies on a branch of spring blossoms or golden tiles with blossoms.
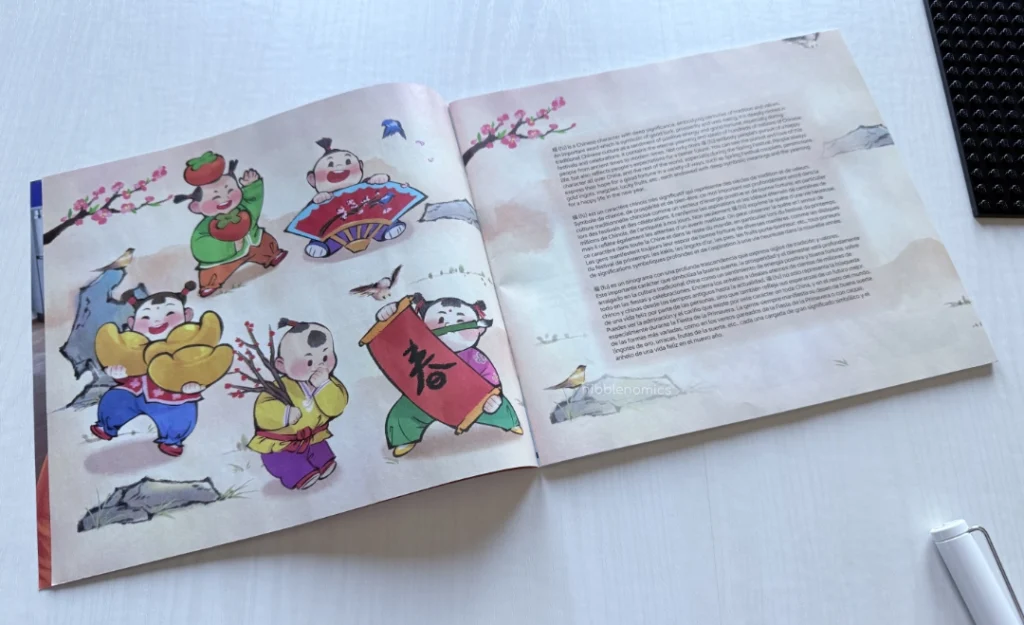
In the first book, Lego added a nice artwork and a small paragraph about the Good Fortune set and why each decorative piece was chosen. I highly recommend reading it.
Book 1, Bag 1: Building the Base
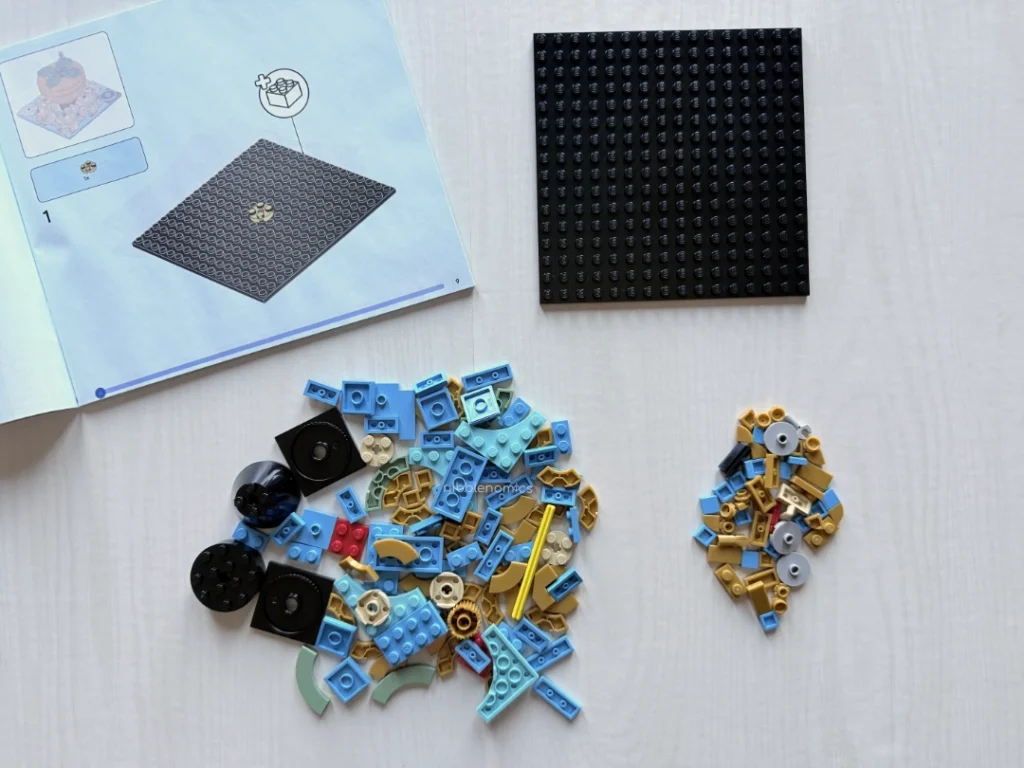
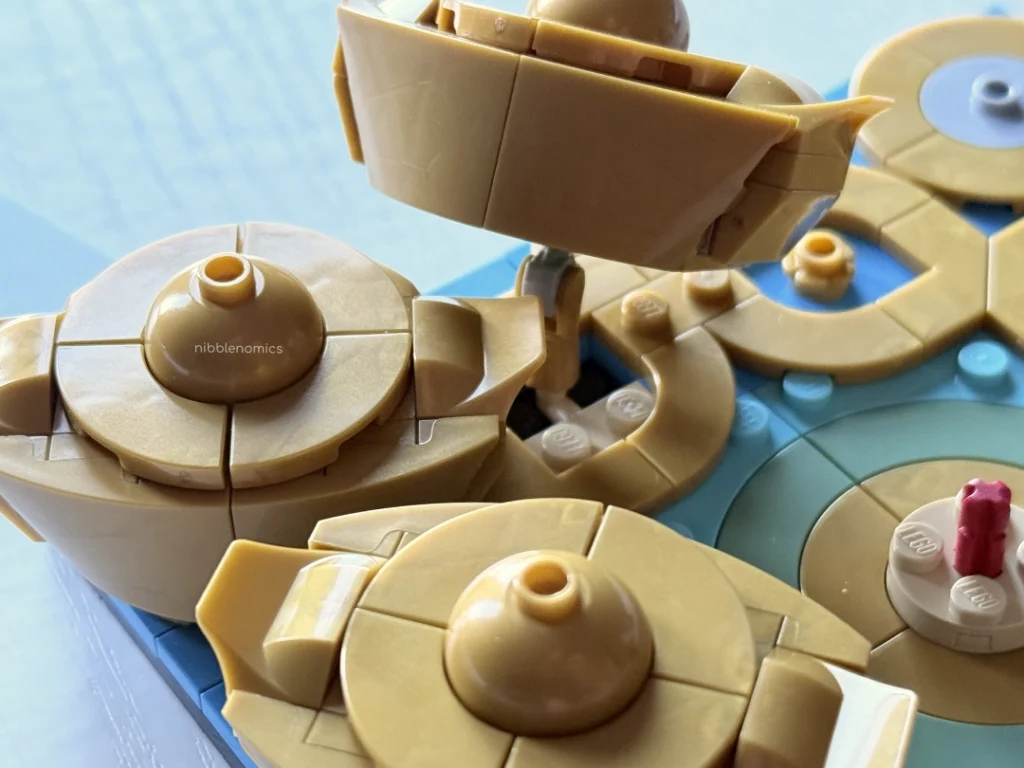
Starting off, everything in bag 1 will be used to build the foundation, which will hold all the decorative pieces in the Good Fortune set. Bag 1 comes with a smaller bag inside, and you’ll be building the pieces on top of the large black square plate that was floating around on its own.
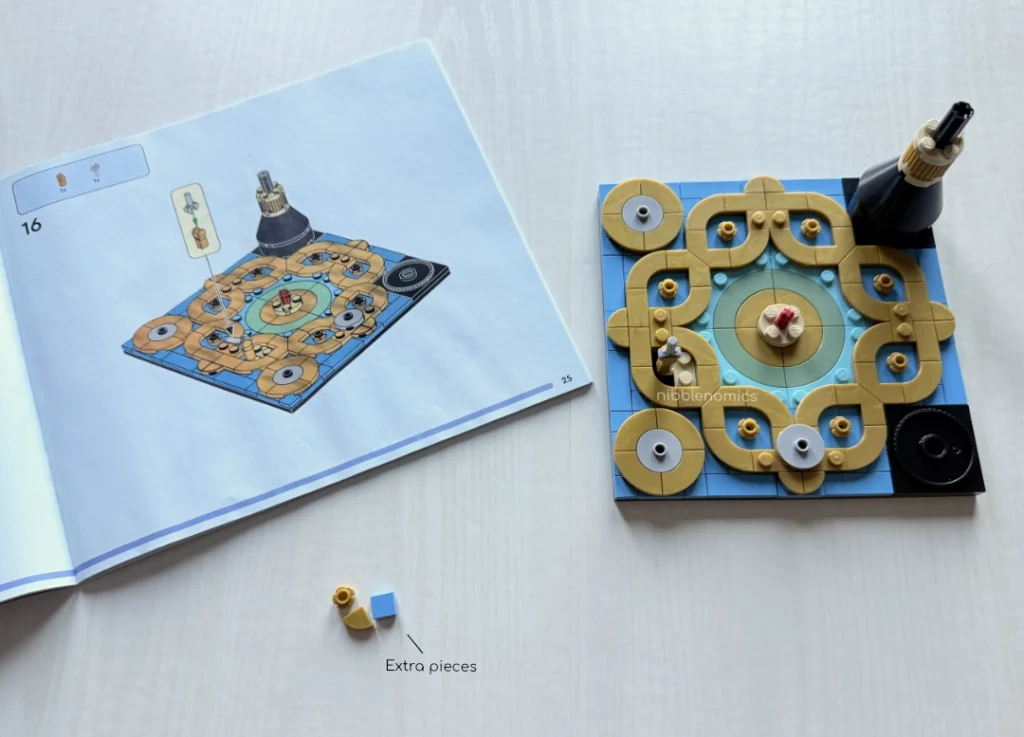
The completed base is quite nice with the golden trim. The 2 black corner pieces on the foundation are for the fan and the scroll. Once you have those parts built, you can place them on the board and rotate them to the angle you want, which is pretty cool. The other 2 corners are for the vase and the gold ingots, and the persimmon fruit goes in the center.
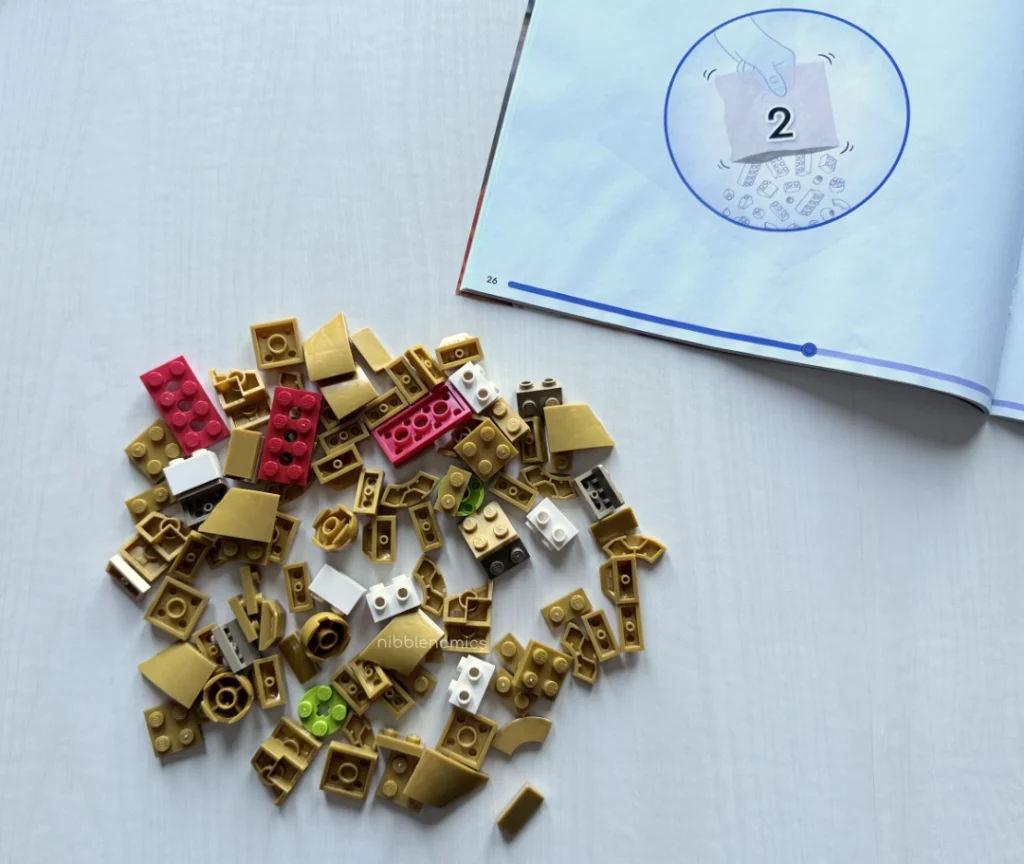
Book 1, Bag 2: Building the Ingots
Bag 2 is a small bag, so be careful not to lose any pieces when dumping them out. In my set, there weren’t any leftover pieces.
You’ll be making the three ingots, which is also the first decorative piece you’ll be building for the set. As long as you keep the gold pieces organized, you can quickly and easily put the ingots together.

Once you finish, place them on the lower left corner of the foundation you built from the first bag. The gray claw (stick?) piece will elevate the bottom of one ingot, while the other two pieces will remain stationary. Putting the ingot on the gray claw piece was easier for me when I took it out and attached it to the ingot before putting it back on the foundation.
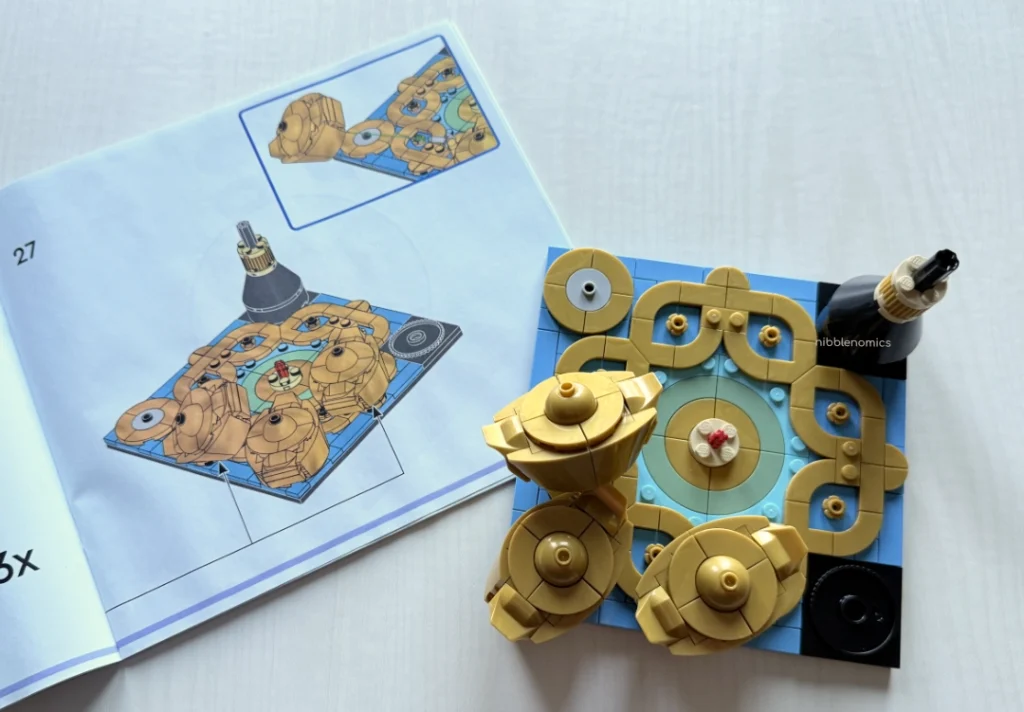
You can angle the top ingot piece however you want, but I recommend waiting until you have the persimmon fruit and the vase settled in before finalizing its position.
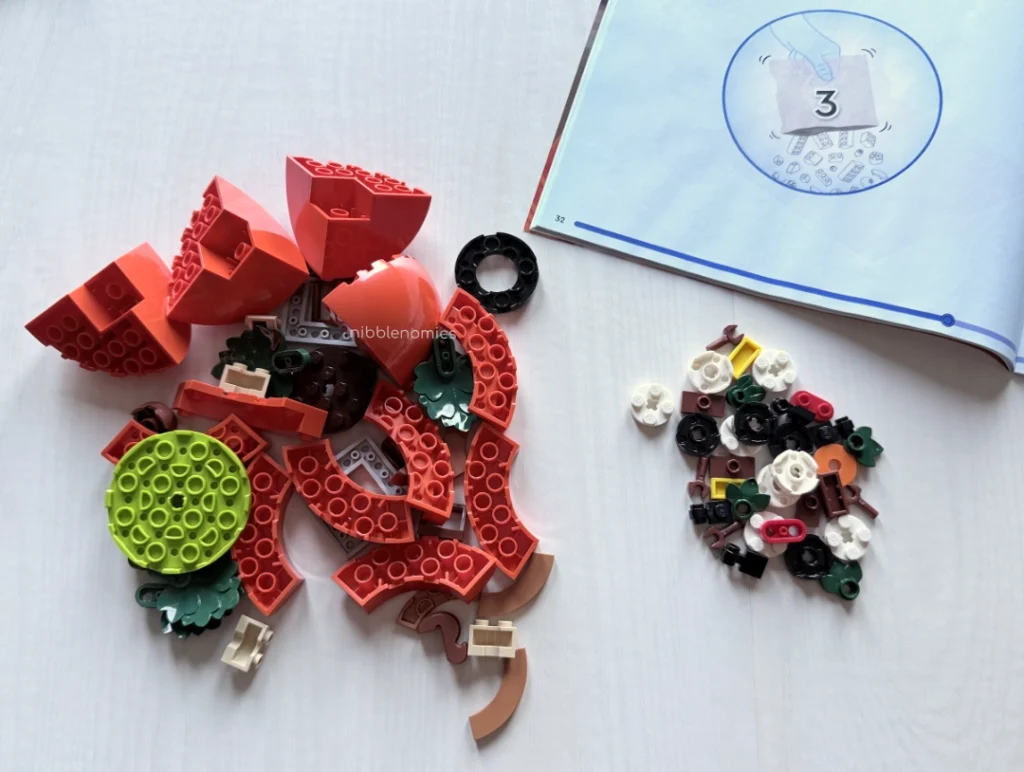
Book 1, Bag 3: Building the Persimmon Fruit
Bag 3 comes with a smaller bag inside. While the third bag is bigger than the second bag, it’s mostly due to the size of the pieces that build the fruit. For this piece, you’ll be making the persimmon fruit and its base.
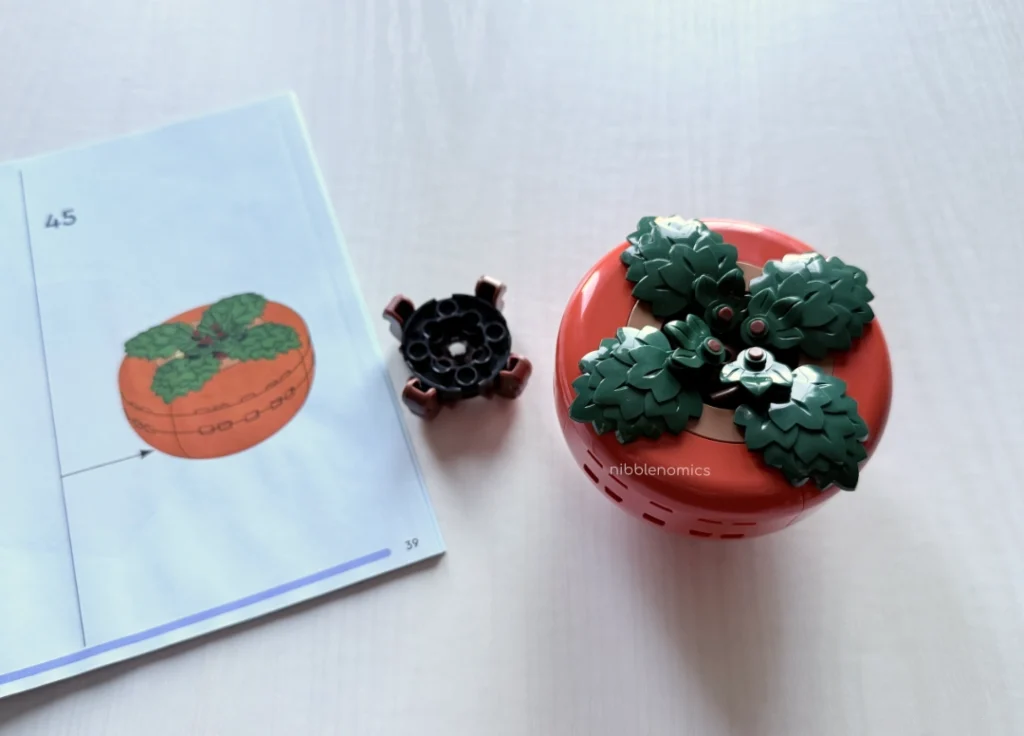
Once you finish the persimmon, place it at the center of the foundation where the red stick piece is. Unfortunately, the fruit doesn’t stay on very tight. It more or less “sits” in the middle of the foundation. The red stick piece is mainly used for keeping the base in place. This makes the persimmon able to rotate but also very easy to move or nudge off.
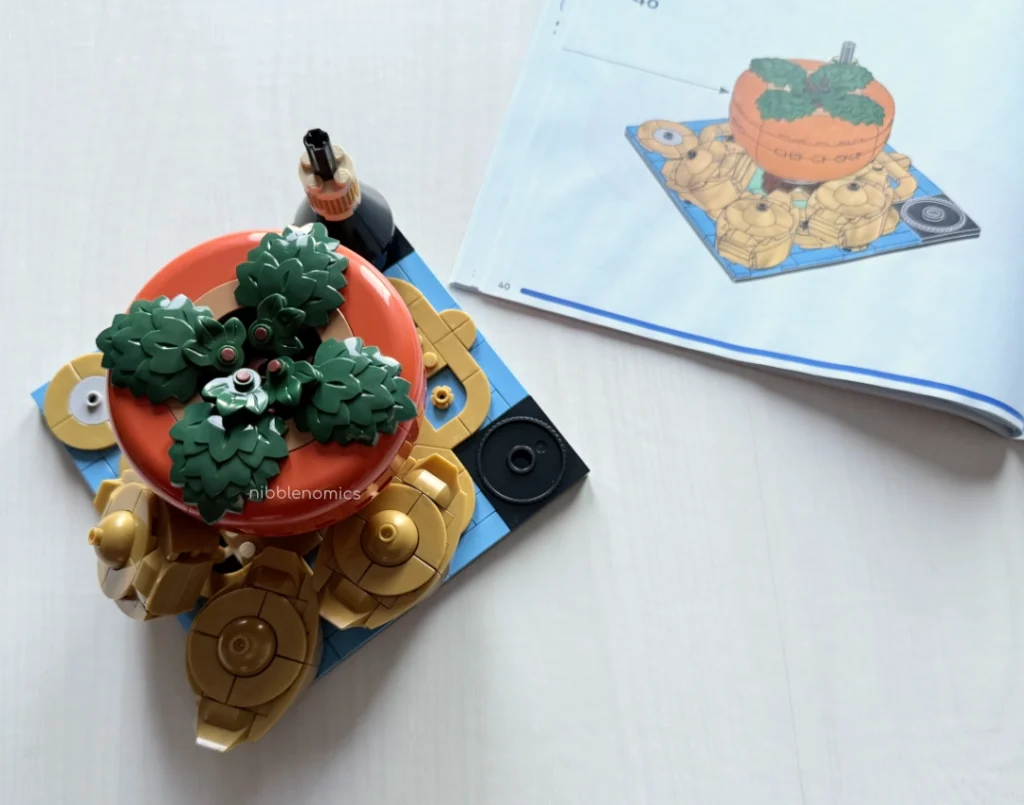
I highly recommend removing the persimmon and transporting it separately if you have to move the set somewhere else.
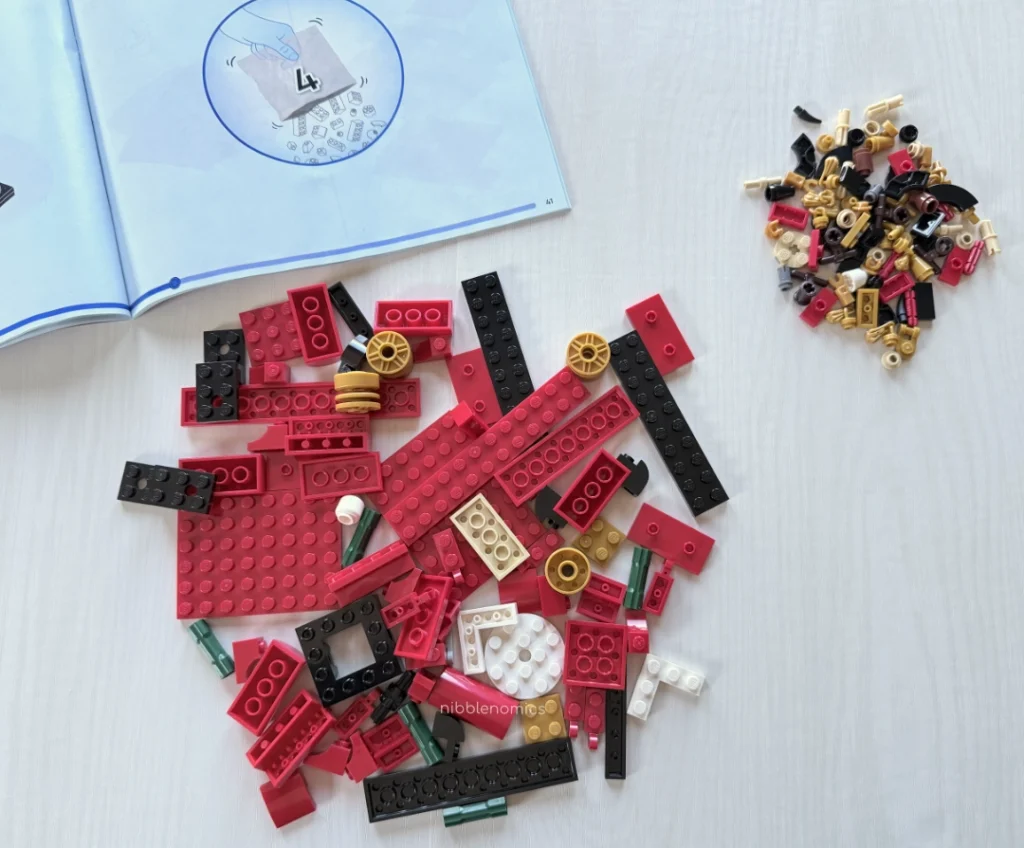
Book 1, Bag 4: Building the Scroll and Brush
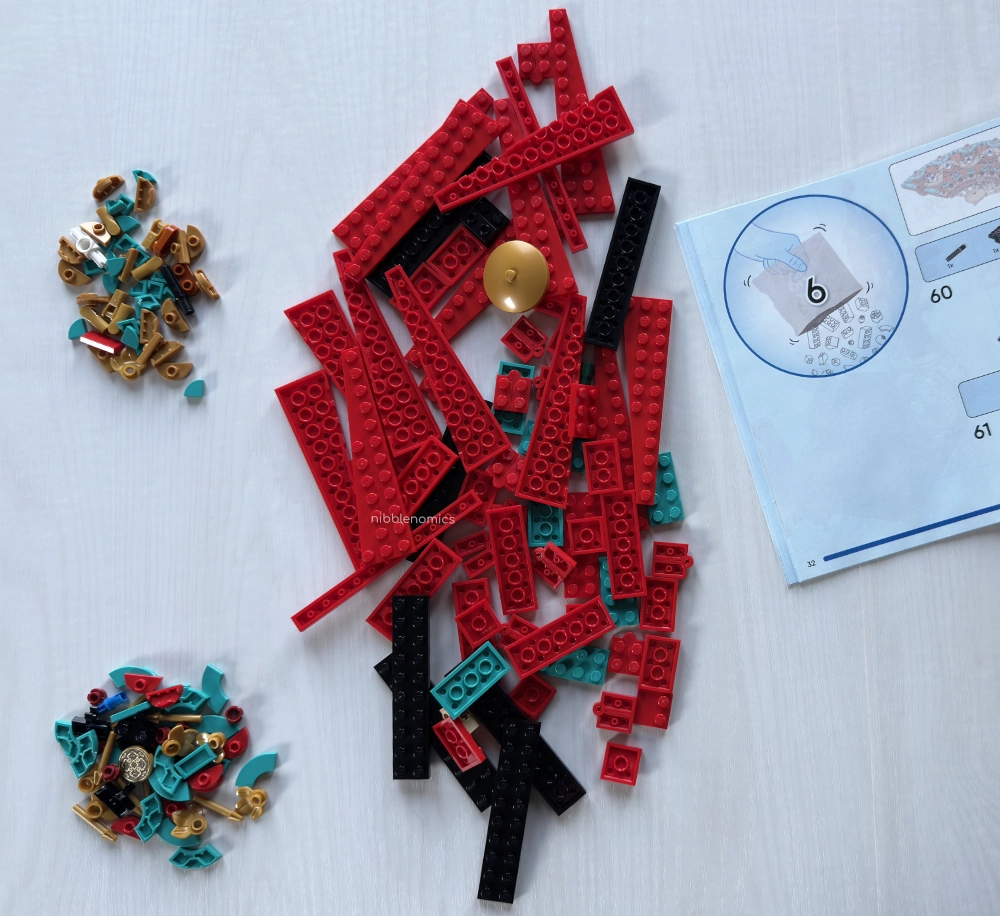
For bag 4, you’ll be building the scroll and calligraphy brush. It comes with a smaller bag inside, mostly with parts used to create the scroll. I also had a lot of small leftover pieces at the end, mostly for the chain bits.
Since bag 4 is a 2-part process, you’ll build the scroll first and then the calligraphy brush. Building the scroll is fairly simple if you can shift through all the different red pieces quickly. There was a part at step 55 that I had a lot of trouble putting in halfway through. It’s a small black circle Lego plate that you shove in between 4 connecting studs (or knobs). I definitely spent way too long trying to put that piece on.
ಥ_ʖಥᵇᵒᵒʰᵒᵒ
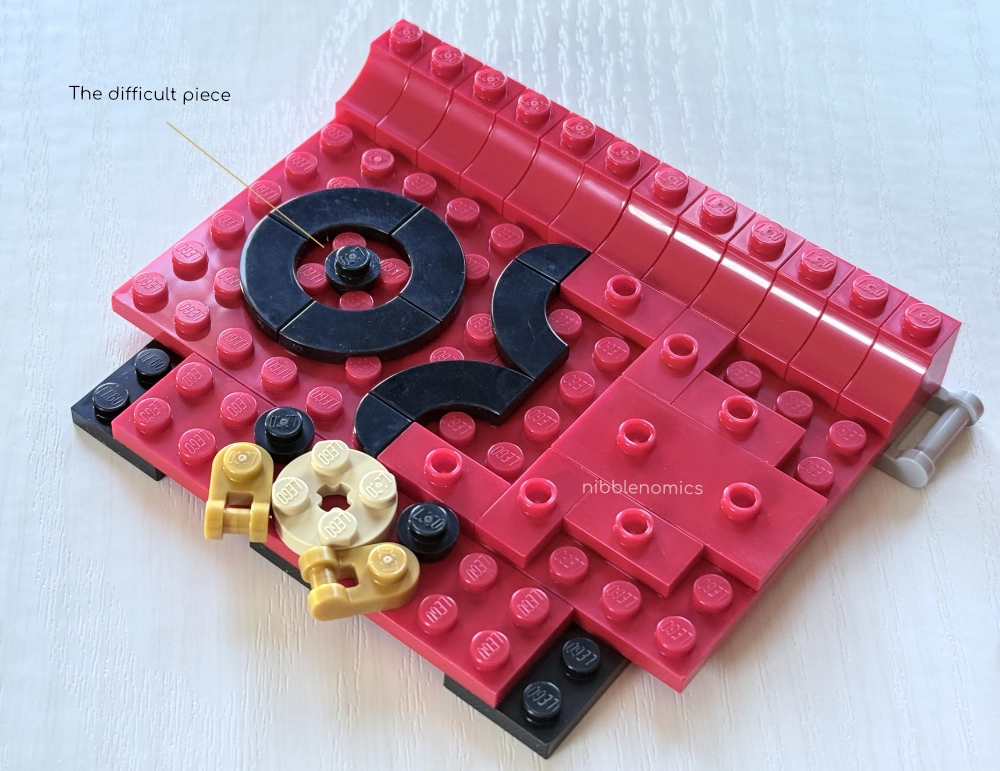
Once you finish that, building the rest of the scroll should be smooth sailing. The only thing left is the calligraphy brush, which is incredibly quick and easy to assemble. Clip the top of the brush onto the gray bar sticking out at the bottom of the scroll.
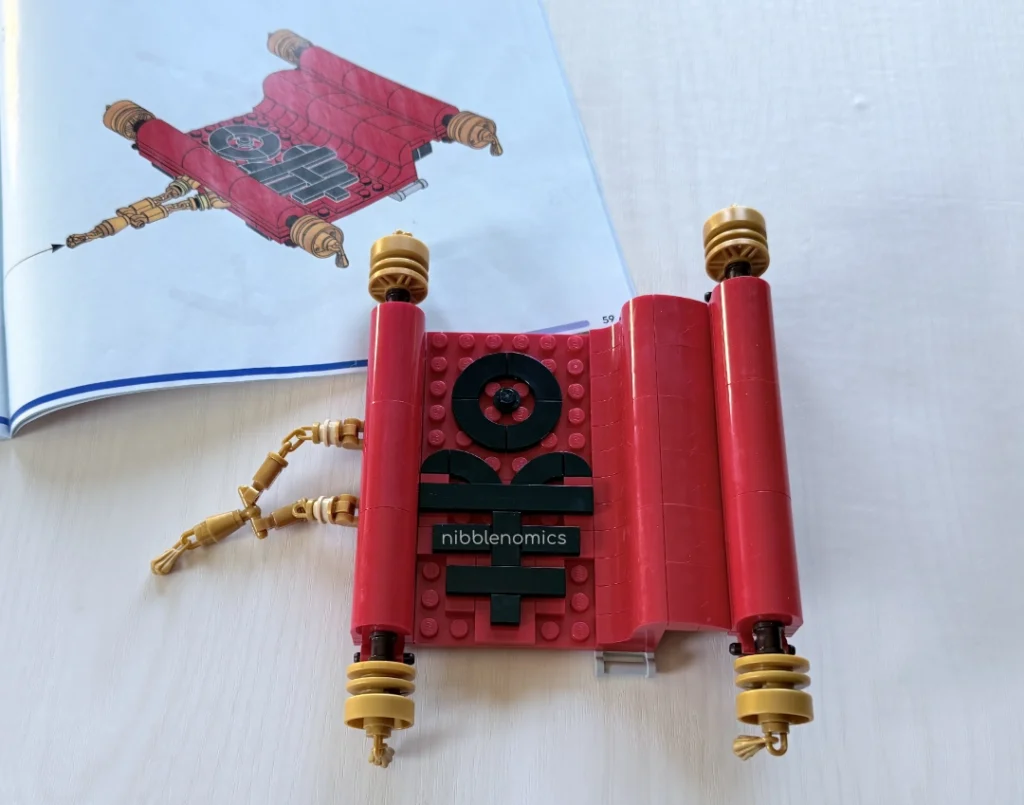
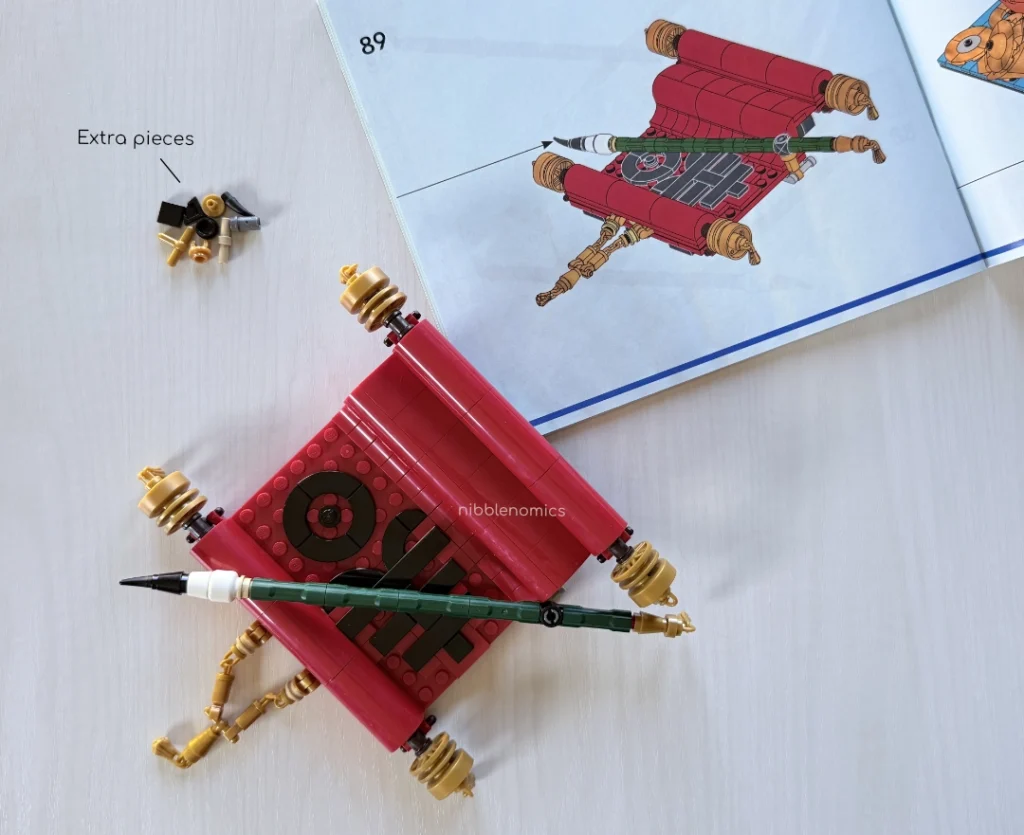
Place the finished scroll and calligraphy brush combo next to the ingots on the foundation, on the round black plate. Snap the bottom part of the scroll onto the black circle plate to secure it. It should also make the scroll rotatable on the board so you can set it to the angle you want. Don’t forget to readjust the brush as well.

This concludes the end of the first instruction book. Now we are officially halfway done!
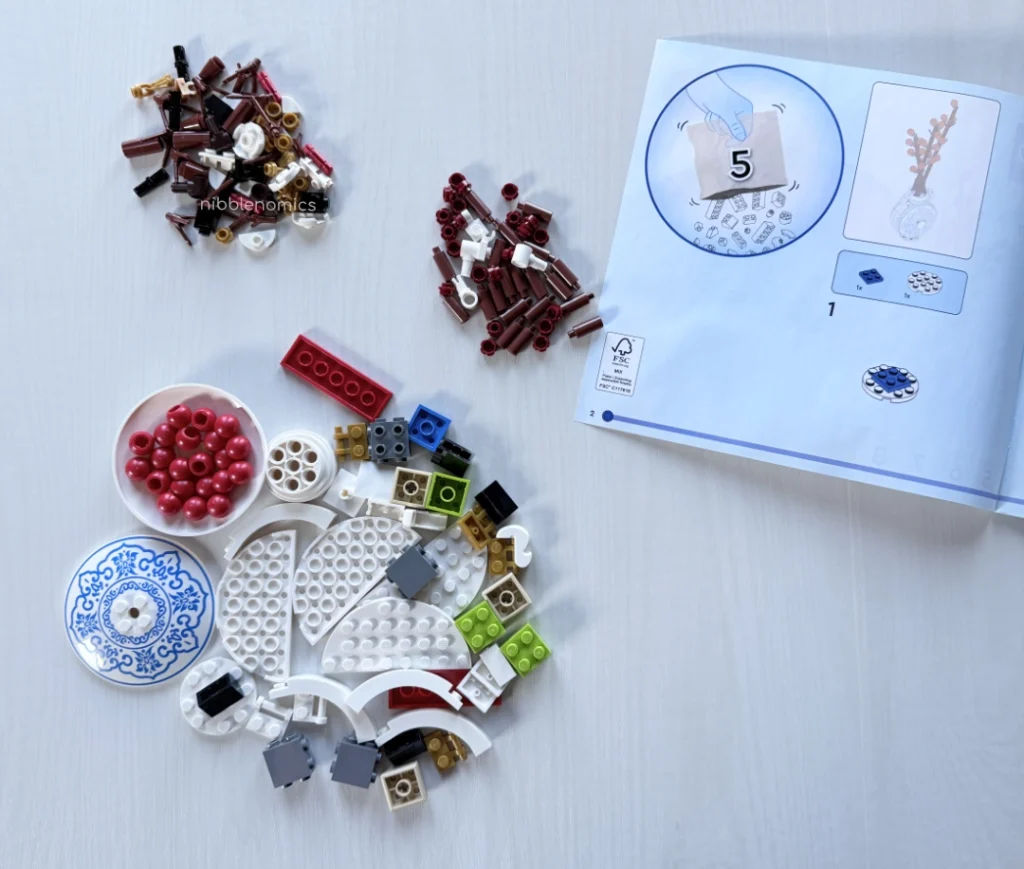
Book 2, Bag 5: Building the Vase
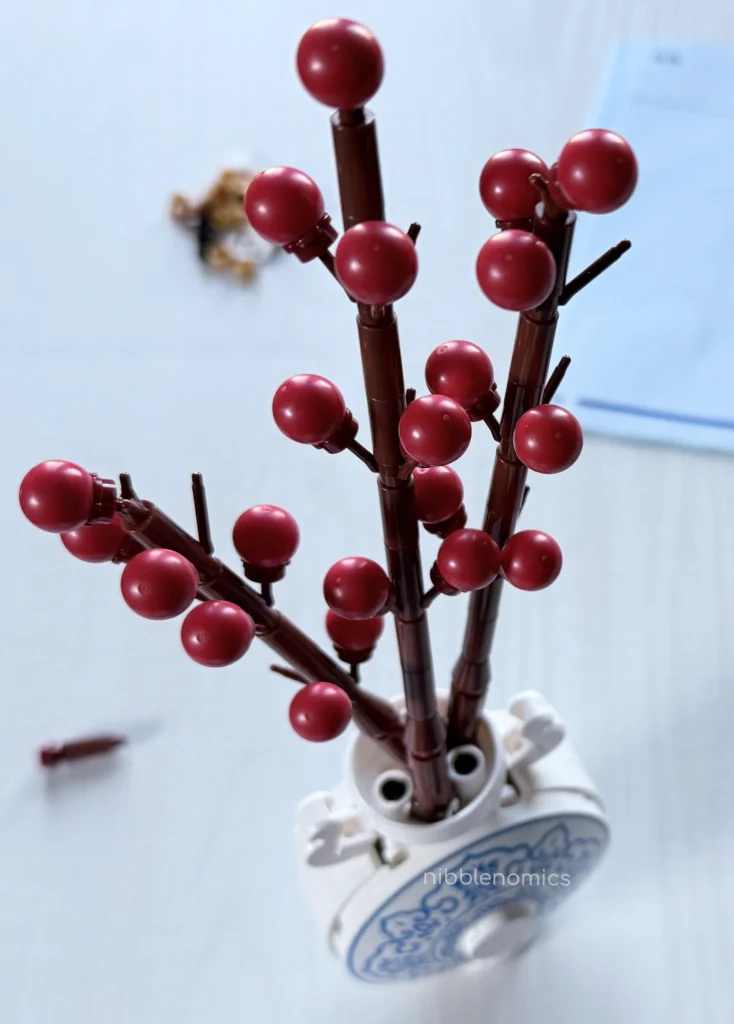
For bag 5, we will be building the vase and the fortune red fruits with two hanging scrolls. The bag comes with two smaller bags inside, mostly used to build the tree branches for the fruit. When dumping the parts out of the packet, watch out for the fruit parts. They can roll pretty easily so I recommend grouping them all from the get-go.
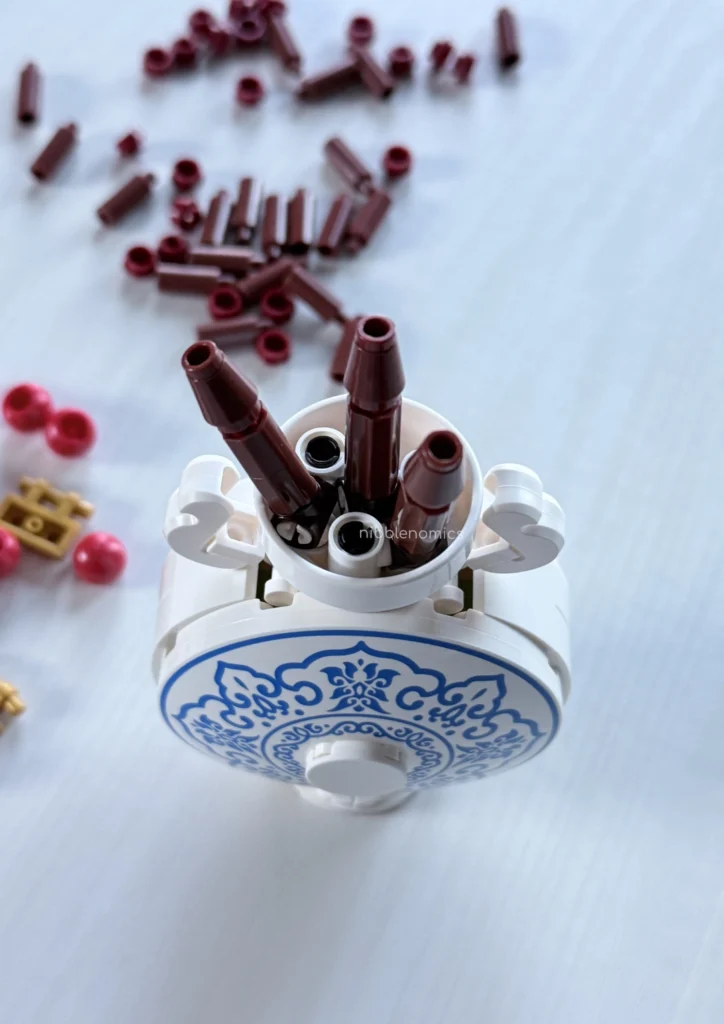
Building the vase and fruit tree is a 2-part process. We’ll be building the vase first. The top of the vase is spinable and has a lot of tube holes. Each tree branch takes up two holes, but there’s enough for you to place the branches how you want them.

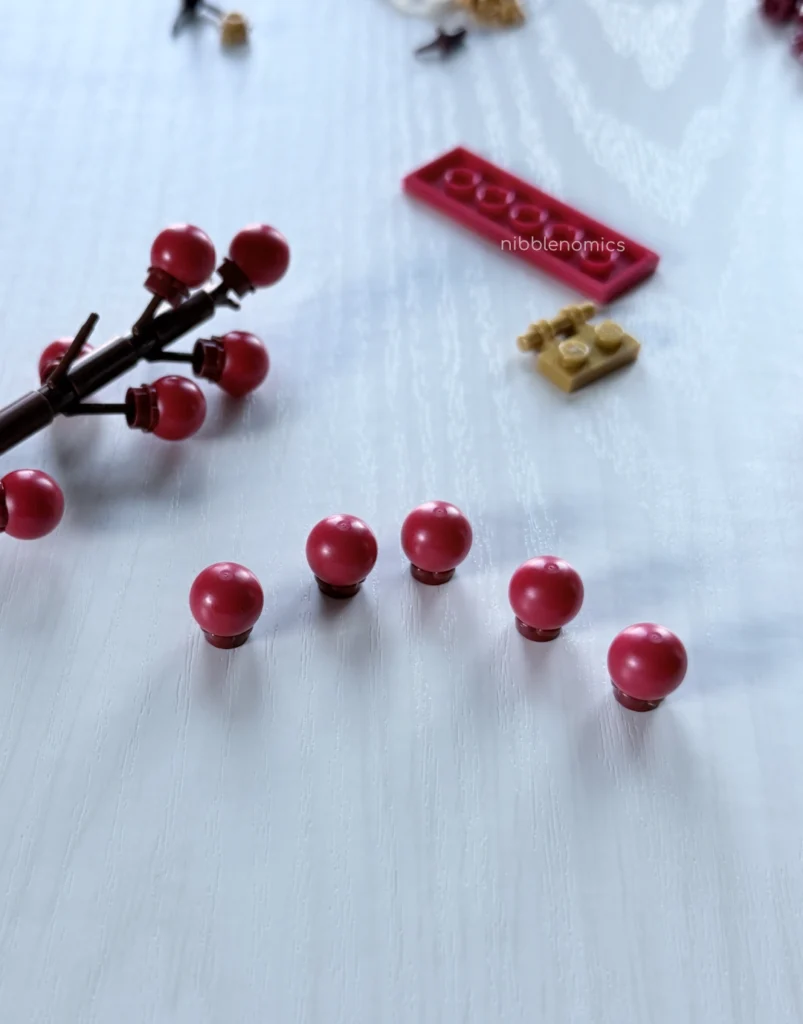
Building the rest of the fruit tree is a straightforward process. Lego shows you an example placement of the red fruits on the tree, but the final look is entirely up to you. The instruction book shows attaching the red fruit as a final step. However, I found it easier to prep the red fruit on the flower base first before putting it on the tree.
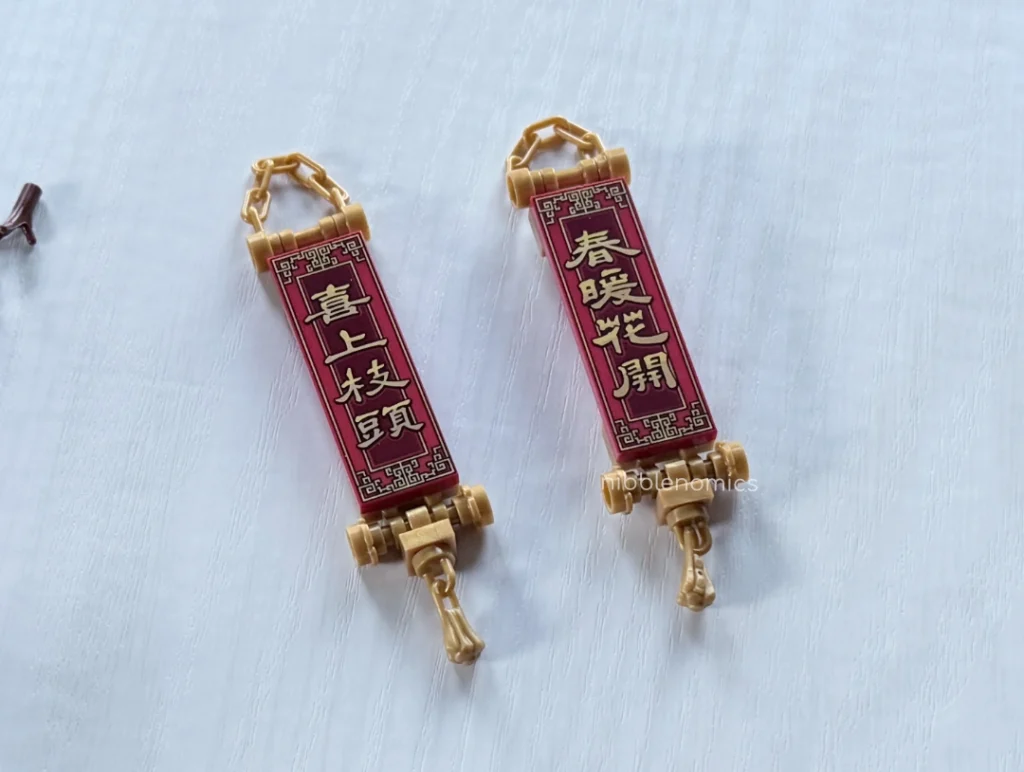
Finally, the last part of completing the vase is to make and hang up the two banners. Each banner has a different phrase, and you can hang them however you want on the tree.
Once you’re happy with how everything looks, it’s time to put it on the foundation. Place the vase next to the ingots in the top left corner. Although the vase clips onto the gray plate, it fits very loosely. It won’t fall off easily like the persimmon fruit, but it’s also not on securely like the scroll.
Book 2, Bag 6: Building the Fan
We are close to the end now!
Similar to the previous bag, bag 6 has two smaller bags inside. For this step, we will only be building the fan itself. The steps to building the individual parts of the fan are mostly repetitive, which makes it easy to build. However, it will be a little flimsy when you’re connecting the parts together. I recommend doing it on a table so that it doesn’t break halfway.
Once you finish the base layer of the fan, completing the top layer will make it much sturdier. Technically, if you didn’t want any design at all on the fan, you can even stop now and attach it to the foundation.
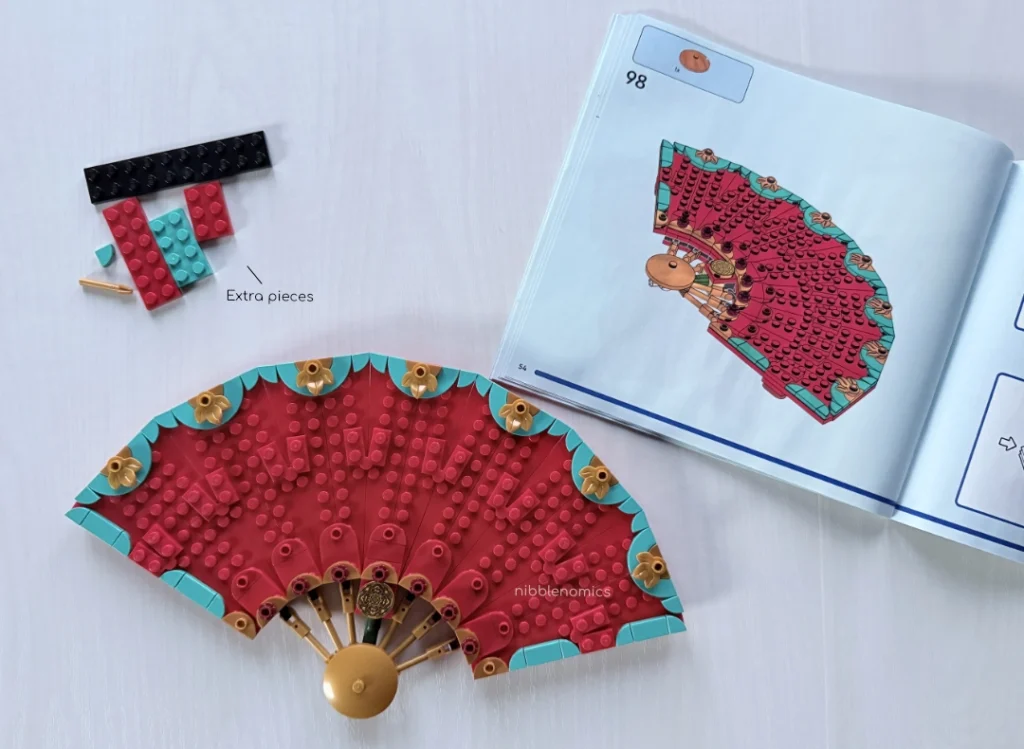
If you choose to continue with a design for the fan, you can only have one or the other. The Magpie bird design is bag 7, page 56 of the instruction booklet. The wavy golden tile with a flower blossom design is bag 8, page 76 in the instruction booklet. The golden tile design is also easier to build compared to the Magpie birds. I would recommend it if you wanted a more simpler look for the fan.
Book 2, Bag 7: Building the Magpie Design for the Fan
The design I chose to go with was the two Magpie birds because I thought it was the prettiest design. I didn’t try out the wavy golden tile design with the blossoms because I didn’t want to open the packet if I wasn’t going to use it. It was best to leave it sealed, especially since I have no formal Lego storage system in place.
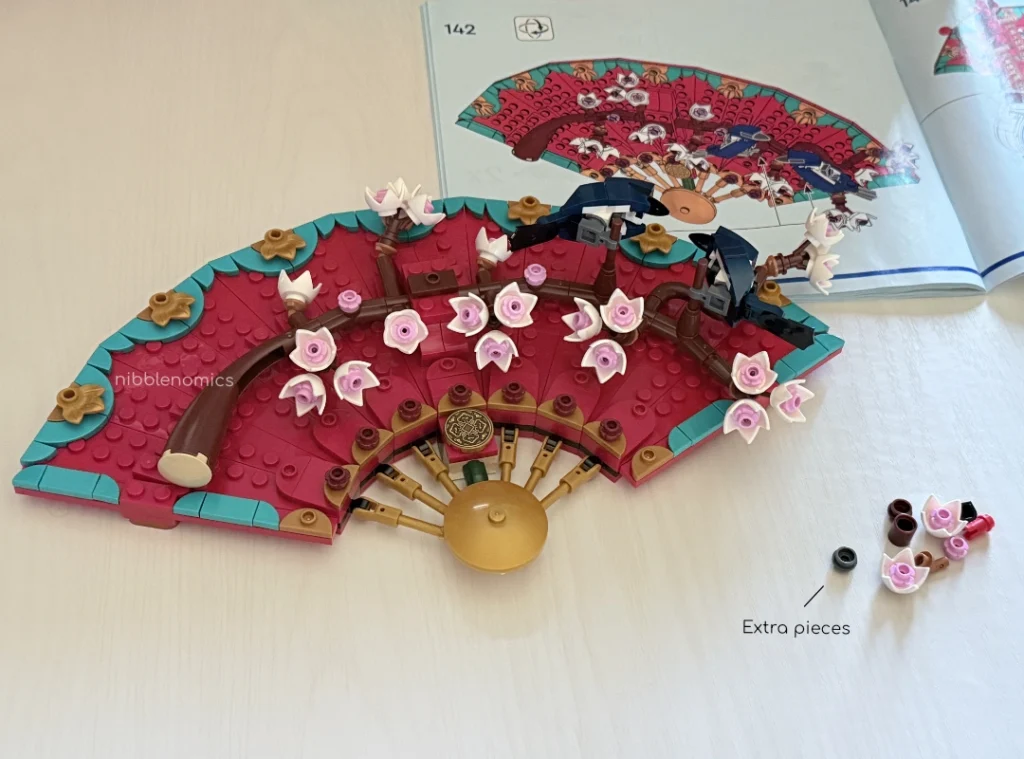
Bag 7 comes with a small bag inside, mostly for the pink flowers and the small connecting branches. The parts used to build the Magpie birds were very creative. Their tails are flippers!

There were only a few leftover pieces remaining, but I had enough for 2 extra flower blossoms in my kit plus a small pink flower piece. I decided to put the extra flowers on the branch where the birds are sitting. As for the last pink flower piece, I placed it on the golden disc at the base of the fan.
Once you finish, place the fan on the foundation to complete the whole set. The bottom of the fan should easily slide down the black tube piece. Once attached, you can easily rotate the fan in any direction by using the gold rotator part.
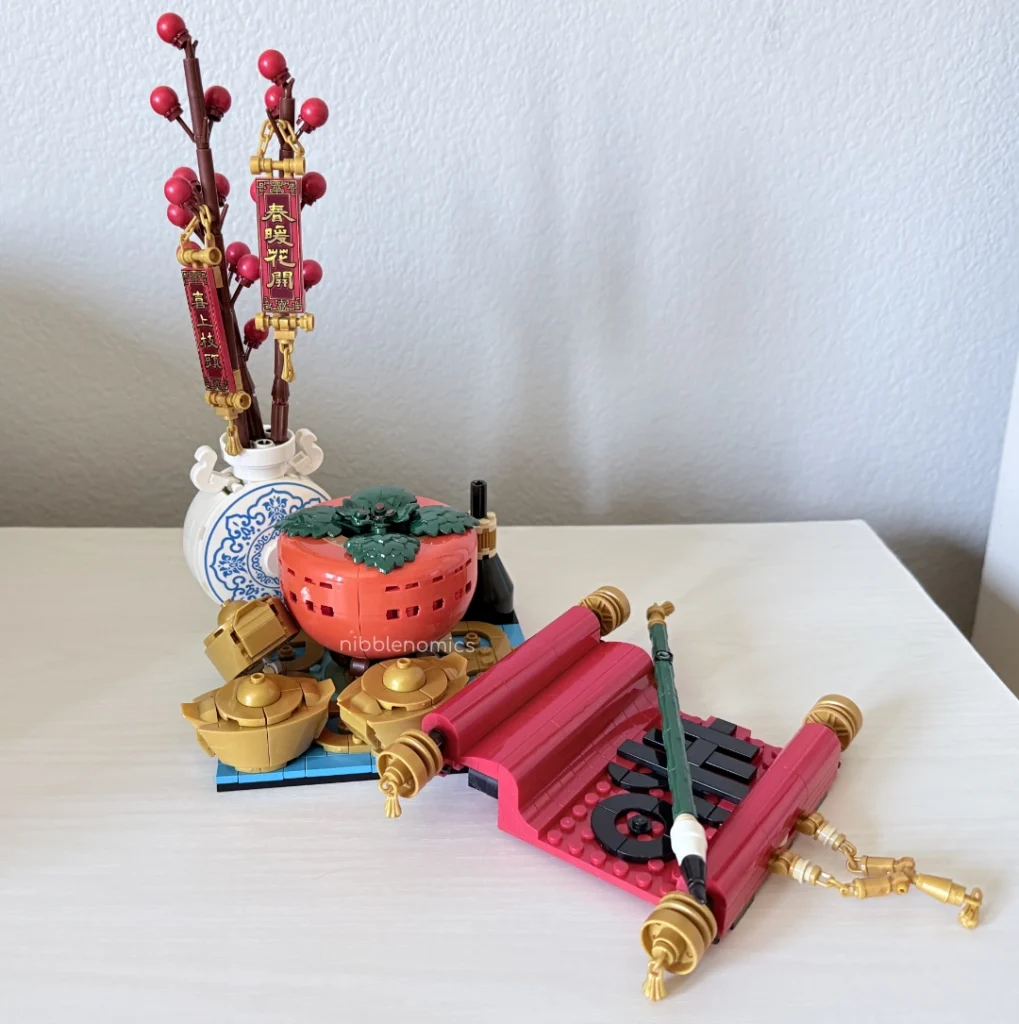
End Result
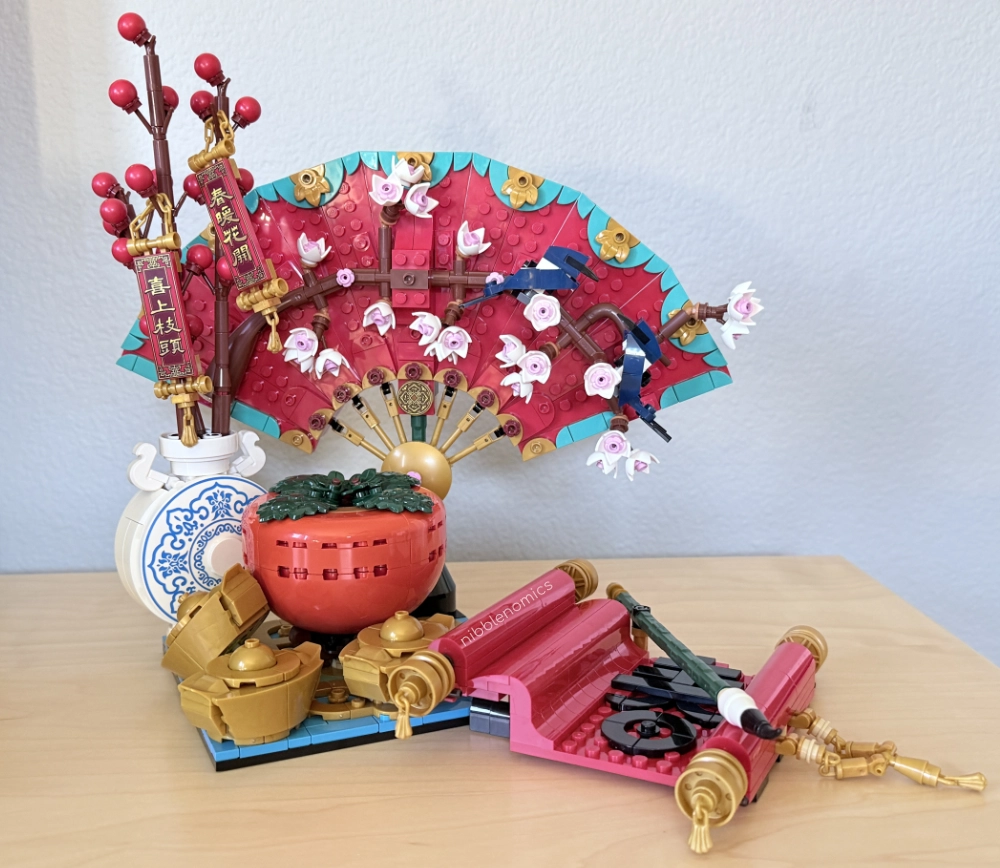
Overall, I definitely think the Good Fortune set was worth the money, especially at the discounted price. There are a lot of decorative items that bring the whole set together.
I think the set would be perfect if the items were more securely connected. For instance, the persimmon fruit, the vase, and the ingots are all fairly loose. The ingots, you can’t tell as much since it’s short and small. The vase and persimmon, on the other hand, are really easy to tip over. Regardless, I’m still pretty happy with how everything looks.
I hope you guys get a chance to build these Lego sets. If you have, I’d love to hear your thoughts about it. If you have any suggestions on how to store extra Lego pieces, feel free to pass on some ideas as well.
Happy Lunar New Year everyone (ノ´ヮ`)ノ*: ・゚
May your year be lucky and fortunes plenty.
* Lego products in this post belong to and are copyrighted by LEGO. I am not affiliated with LEGO, and this is an honest review for products that I bought.
Leave a Reply